In
Technical
Trampoline Safety
Posted on July 25, 2018
GUIDE TO TRAMPOLINE SAFETY
For the last 60 years safety has been paramount to Mr Trampoline.Safety Tips
All trampoline companies like to claim that they have the safest product. In fact, compared to sports like football the incident of injury on a trampoline is minimal. Learning correct techniques and safety practices will greatly reduce mishaps.Five points to minimise risk
Dr H Edsel Buchanan, a three time NCAA Trampoline Champion, recommends the following five points to minimise risk:- Select a trampoline that adheres to safety standards and is made with quality materials
- Maintain the trampoline to good working order
- Use the trampoline at appropriate times
- Be a responsible parent / owner
- Seek guidance from a qualified trampoline instructor for correct technique and progression to more challenging manoeuvres. You will find this particularly rewarding.
Further tips
- Take particular care to observe the weight limitations
- Keep the area around the trampoline clear
- Bare feet provide a better grip
- Jump in the centre of the trampoline
- Replace worn parts to avoid further wear which may result in sudden breakage
- Teach a set of ‘trampoline rules’ to children with regard to their individual age and ability
- Have a protective surface around your trampoline to cover springs and framework
Quality of materials is more important than shape
Since the 1930′s trampolines have been rectangular in shape. In the late 1970′s non rectangular trampolines (circular) were introduced. Some companies have claimed that because their trampoline is round it is safer. It is simply untrue to state that shape alone offers maximum safety. Independent research has shown that from a safety perspective the ‘G’ stress delivered on the back and neck during the bounce is less with trampolines that deliver progressive stretching of the springs (rectangular trampolines). The progressive stretching of the springs produce a deeper, softer more controlled bounce. This is quite different to a round trampolines. Also spring length and stretch range is a key factor in delivering a safer more controlled bounce.
In
Technical
Trampoline Make Over & Maintenance Check
Posted on July 25, 2018
MAKEOVER
As a general rule, our trampolines are low maintenance - but like any outdoor product, they require a ‘preventive check’ after some years of use. MrTr-MManual-MaintenanceManual A mat & maintenance makeover includes:- Painting the mat both sides: We use a premium, heavy duty, UV coated, rubberised, custom formulated paint. NOTE: The mat requires painting every 3-4 years or when the ‘jump zone’ starts to show some wear.
- Clean out the pit: Has it been years since the last clean out?
- Remove all rubbish
- Maintenance check: Have you had your trampoline for 3-4 years?
MAINTENANCE CHECK
A thorough maintenance check includes:- Check the mat for holes, tears and any warning signs
- Check all loops are connected to the hanger clips
- Check the condition of the rubbers & padding
- Check the springs and spring count to make sure there are none missing or broken or showing signs of stress.
Contact MrTrampoline for a price on a Mat & Maintenance Makeover. The benefit of a MrTrampoline expert doing the maintenance check is that we have an experienced eye and will undergo any repairs on the spot. Of course you can do your own maintenance check. If you discover a missing clip or feel your mat needs a paint, email us your shopping list and we will mail out the parts and materials you require. ‘Built with superior quality materials we expect our trampolines to last 25 years’ - Adam Richards (MrTrampoline) Contact Mr Trampoline to discuss.
In
Installation , Technical
Installation
Posted on July 25, 2018

IN GROUND TRAMPOLINE INSTALLATION
‘Surprisingly, we can install our trampolines just about anywhere. Of course, a flat location normally means a straight forward ‘dig’. But we do enjoy a challenge.’ - Dave Mason (Mr. Trampoline) Normal In Ground Trampoline Installation Sequence:- We will arrive with the frame and bolt the sides together on site. This will give us the size of the frame to move around on site to find the best location.
- We then mark the leg positions & move the frame.
- Then we dig the 6 or 8 leg holes & a branch to allow the frame to set flush with ground level
- Once this is completed, we attach the legs to the frame & lower the whole frame into the leg footings.
- We then level the frame with a spirit level & fill the leg holes with concrete.
- We mix a strong blend of sand, large stone and cement, we do not recommend rapid set.
- Then we leave for a day or 2 while the leg footings set.
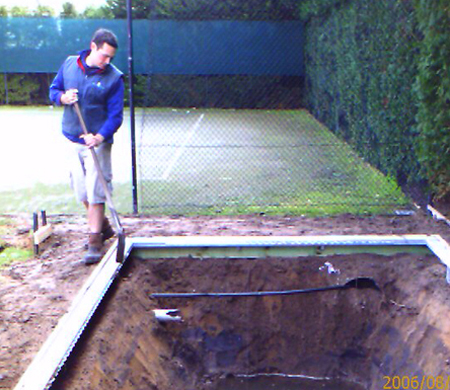
- When we return we start digging inside the frame according to the depth & shape needed for the size & model of frame chosen. But basically, the hole is 1100-1200mm deep & has an angled wall of about 800mm narrower at the base (the batter!)
- When the hole is complete, we dig a small branch around the outside of the frame & install a timber plinth. This acts as a low retaining wall (non structural) to stop to soft surface loam from vibrating into the hole over time.
- We attach a light wire or mesh to the timber and the walls of the pit and then apply a cement render about 40-50mm thick to the walls. This will stop the pit walls eroding in the event of very heavy rainfall or from a damaged sprinkler running for ages in the one spot 🙂
- If the base is in clay, where possible we run a pipe from the base to a lower outlet to allow water to expel from the pit. If this is not possible we install a pump with a float switch to regularly and automatically remove water. This will stop water & mosquitos from breeding in the bottom & annoying your summer BBQ’s.
- Once this is all complete, we fit off the mat, springs and rubbers, then have a mandatory ALL-IN test bounce. This is the best part of our job.
- By this time the kids are usually busting to get on, so while we pack away our gear & tidy up, the kids go berserk 🙂
Note: Installation normally takes between 2-4 days depending on soil texture and location. [gallery ids="1429,1432,1431,1433,1430,1428"]
- We will arrive with the frame and bolt the sides together on site. This will give us the size of the frame to move around on site to find the best location.
- We then mark the leg positions & move the frame.
- Then we dig the 6 or 8 leg holes & a branch to allow the frame to set flush with ground level
- Once this is completed, we attach the legs to the frame & lower the whole frame into the leg footings.
- We then level the frame with a spirit level & fill the leg holes with concrete.
- We mix a strong blend of sand, large stone and cement, we do not recommend rapid set.
- Then we leave for a day or 2 while the leg footings set.
- When we return we start digging inside the frame according to the depth & shape needed for the size & model of frame chosen. But basically, the hole is 1100-1200mm deep & has an angled wall of about 800mm narrower at the base (the batter!)
- When the hole is complete, we dig a small branch around the outside of the frame & install a timber plinth. This acts as a low retaining wall (non structural) to stop to soft surface loam from vibrating into the hole over time.
- We attach a light wire or mesh to the timber and the walls of the pit and then apply a cement render about 40-50mm thick to the walls. This will stop the pit walls eroding in the event of very heavy rainfall or from a damaged sprinkler running for ages in the one spot 🙂
- If the base is in clay, where possible we run a pipe from the base to a lower outlet to allow water to expel from the pit. If this is not possible we install a pump with a float switch to regularly and automatically remove water. This will stop water & mosquitos from breeding in the bottom & annoying your summer BBQ’s.
- Once this is all complete, we fit off the mat, springs and rubbers, then have a mandatory ALL-IN test bounce. This is the best part of our job.
- By this time the kids are usually busting to get on, so while we pack away our gear & tidy up, the kids go berserk 🙂
In
Health-&-Games
Athlete Cross Training
Posted on July 25, 2018

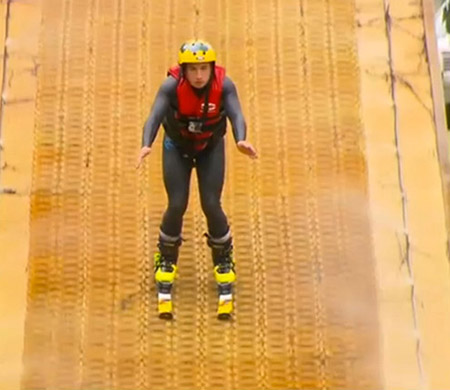
Budding young athletes are often pointed towards trampolining in the off-season. We all know that trampolining is great fun and the enjoyment of a high performance bounce provides hours of entertainment, but trampolines also make great cross-training tools. The cross training benefits are numerous: Improved coordination, balance, core strength, rhythm, muscle control, timing and motor skills. Obviously aerial skiers, divers, gymnast and snowboarders can fine tune their techniques and tricks safely and effectively on a trampoline. But all codes of football and just about every other sport can benefit through improved balance, core strength and learning how to fall. Let’s not forget that trampolining is an Olympic sport and elite trampolinists have skills that cross over into many events (diving, gymnastics, snowboarding). There are many trampolinists who have swapped sports because the required skill set is so similar to what they have mastered on a trampoline. For people who just like to bounce Happily, even just regular, casual jumping can lead to a long list of health and physical benefits. A report by NASA in the Journal for Applied Physiology asserted that rebounding was the most efficient, effective form of exercise; 10 minutes of bouncing equals 33 minutes of running. The general benefits of trampolining include: • lowering the risk of cardiovascular disease by strengthening the heart through increased pulse rate • strengthening the legs (improving the cardiovascular pumping function) • core strength and balance • bilateral motor skill development • provide a lower-impact cardio workout • burn calories; a 75 kilogram adult can burn 133 calories jumping on a trampoline for 30 minutes • reduce stress, anxiety and depression from endorphins [gallery ids="1404,1405,1406"]
In
Games , Health-&-Games
Bounceball
Posted on July 25, 2018

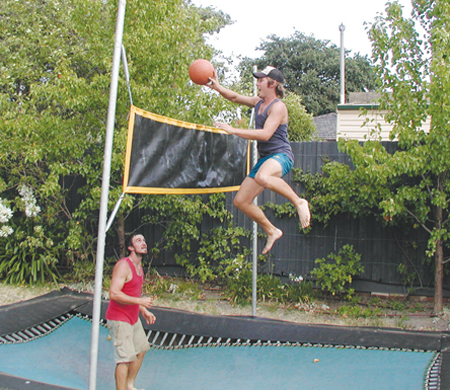
BounceBall is fun for the whole family. It is great entertainment and easy to install or pack away. BounceBall brings another dimension to trampolining. Mr Trampoline BounceBall products are heavy duty and designed to last.The rules of Bounce Ball
The game is fun for all ages and is played exclusively on a trampoline. The rules are similar to those of beach volleyball – only the server can win a point. For 2 Players- STEP ONE: Decide how many points you want to play to (5 points is a great place to start).
- STEP TWO: Toss a coin to see who serves first.
- STEP THREE: Begin to jump in unison. Both players will count out 3 synchronized bounces and the game begins.
- STEP FOUR: The server lobs the ball over the net. The receiver must catch the ball and throw it back over before touching the trampoline. NOTE: Beginners are allowed one bounce with the ball.
Earn points by:- Forcing your opponent to touch the trampoline while holding the ball.
- The ball touching the trampoline on your opponent’s side.
Lose the point by:- The ball landing outside the trampoline.
- Not returning the ball over the net.
Once a point has been won, the players begin the synchronised jump again and the ball is put back into play.
In
Health-&-Games , Somersaults
The Forward Somersault
Posted on July 25, 2018

